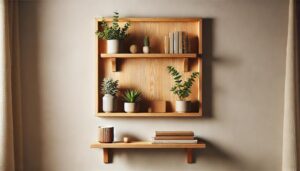
HOW TO MAKE A WOODEN WALL SHELF AT HOME: A STEP-BY-STEP DIY GUIDE
DIY Wall Art Ideas
Want to add a stylish and functional touch to your home? A wooden wall shelf is one of the easiest DIY projects to personalize your space. At ezPRATIK, we say “Easy Pratik, DIY Fun,” and this guide invites you to create something simple yet impressive. All you need are a few materials and a bit of enthusiasm. Let’s get started!
Looking to spruce up your home with a touch of style and practicality? A wooden wall shelf is a simple, beginner-friendly DIY project that lets you customize your space without breaking the bank.
At ezPRATIK, we’re all about “Easy Pratik, DIY Fun.” This guide will walk you through creating a shelf that’s both functional and eye-catching.
All it takes is a handful of materials, a bit of time, and this easy-to-follow tutorial. Whether you’re organizing books, displaying plants, or adding charm to a bare wall, this project is for you.
Let’s get started! In this guide, we’ll cover every step—from gathering supplies to mounting your shelf—plus share tips to make the process smooth and enjoyable. We’ll even suggest a few handy tools and materials (some with Amazon links to save you time), but the focus is on helping you succeed.
Ready to craft your own wooden wall shelf? Let’s dive in!

WHY MAKE YOUR OWN WOODEN WALL SHELF?
A wooden wall shelf isn’t just storage—it’s a chance to add personality to your home. Here’s why this DIY project stands out:
A wooden wall shelf isn’t just storage—it’s a chance to add personality to your home. Here’s why this DIY project stands out:
- It’s budget-friendly—build something unique for less than most store-bought shelves.
- It’s customizable—choose your wood, size, and finish to match your decor.
- It’s easy to do—perfect for beginners with basic tools and minimal experience.
- It’s space-saving—free up floor space while showcasing your favorite items. Best of all, you’ll feel proud every time you see it on your wall. Curious about what you’ll need? Let’s break it down.
MATERIALS AND TOOLS YOU’LL NEED
To keep things simple, here’s a straightforward list of what you’ll need. You can find these at any hardware store or online. We’ve included a couple of Amazon suggestions for convenience.
Materials:
- Wood Plank—A 1×10-inch pine board, about 24 inches long. Pine is affordable and easy to work with.
- L-Brackets—Two 6-8 inch metal brackets for support. Try the Everbilt 6-Inch L-Brackets.
- Wood Screws—1-inch screws for the brackets and 2-inch screws for the wall.
- Wall Anchors—Plastic drywall anchors (optional, depending on your wall).
- Wood Stain or Paint—Pick a stain or paint to suit your style—Minwax or chalk paint are popular choices.
- Sandpaper—120-grit and 220-grit for smoothing the wood.
Tools:
- Measuring Tape—For accurate sizing and placement.
- Pencil—To mark your cuts and mounting spots.
- Saw—A hand saw or power saw (like the BLACK+DECKER Electric Hand Saw if you’re cutting yourself).
- Drill—For driving screws into the wood and wall.
- Level—To ensure your shelf sits evenly.
- Paintbrush or Rag—For applying stain or paint.
These basics will get you far. If you’re missing anything, local hardware stores or Amazon can fill the gaps.
Now, let’s build that shelf!
STEP-BY-STEP GUIDE TO MAKING YOUR WOODEN WALL SHELF
Here’s a clear, detailed walkthrough to create your shelf. Follow along, and you’ll have it up in no time.
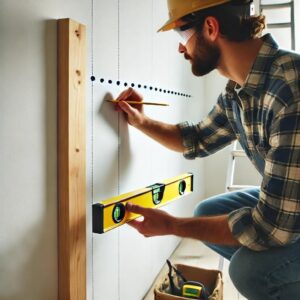
Step 1: Plan Your Shelf—Start by figuring out where your shelf will go.
- Size: A 24-inch length and 10-inch depth is standard—measure your space to be sure.
- Purpose: Will it hold books, decor, or something else? This decides the bracket strength.
- Spot: Use your measuring tape and pencil to mark where it’ll hang on the wall. A quick sketch can help—keep it simple and precise.
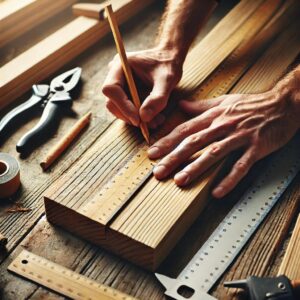
Step 2: Cut the Wood (If Needed)—If your wood isn’t the right length:
- Measure 24 inches (or your preferred size) and mark it with a pencil.
- Secure the plank on a stable surface.
- Cut along the line with your saw—slow and steady for a clean edge.
- Sand the cut end with 120-grit sandpaper to smooth it out. Tip: Many hardware stores cut wood for free—bring your measurements and save time.
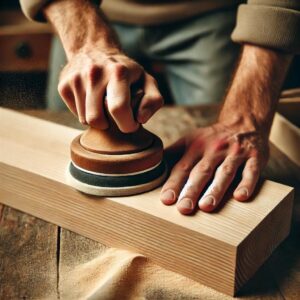
Step 3: Sand the Wood—A smooth surface makes all the difference:
- Use 120-grit sandpaper to tackle rough spots and splinters.
- Switch to 220-grit for a finer, polished finish—sand all sides.
- Wipe the wood with a damp cloth to remove dust. This step preps your wood for a flawless finish.
Step 4: Stain or Paint Your Shelf—Time to add some character:
- Stain—Brush or wipe on a thin layer of wood stain, following the grain. Let it sit for 5-15 minutes, wipe off excess, and dry for 4-6 hours.
- Paint—Apply paint in thin coats with a brush—two layers usually do it, drying 2-3 hours between each. Want extra protection? A clear polyurethane coat (dries overnight) seals the deal.
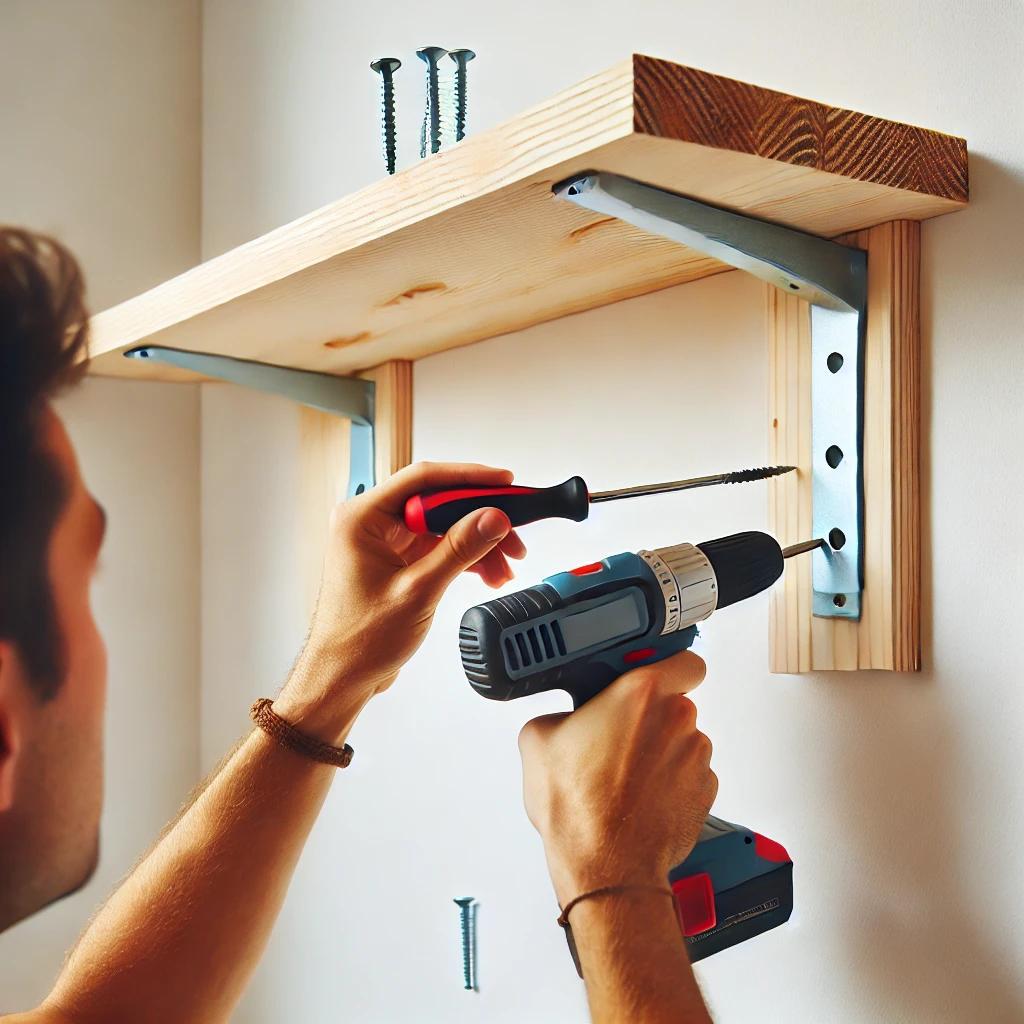
Step 5: Attach the L-Brackets—Make it sturdy:
- Lay the wood face-down.
- Place an L-bracket 2-3 inches from each end.
- Mark the screw holes with your pencil.
- Drill small pilot holes into the wood.
- Screw the brackets in with 1-inch screws. Check that they’re aligned and flush with the wood’s bottom.
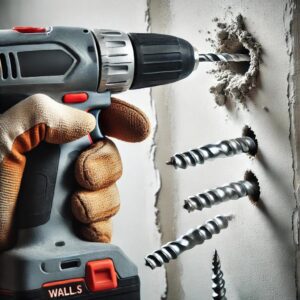
Step 6: Mount the Shelf—Put it up:
- Hold the shelf against the wall at your marked spot.
- Use a level to ensure it’s straight.
- Mark the bracket holes on the wall.
- Drill pilot holes into the wall.
- Add wall anchors if you’re not hitting studs.
- Screw in 2-inch screws to secure the brackets. Step back—you’ve got a mounted shelf!
TIPS FOR A PERFECT SHELF
- Find Studs—A stud finder helps you mount into solid wood for extra strength.
- Test It—Press down gently after mounting to check stability.
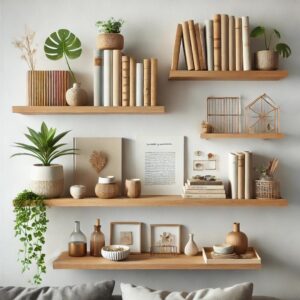
- Decorate—Add lightweight items first—plants, books, or frames work great.
- Safety—Wear goggles when cutting and gloves when sanding.
HOW MUCH WILL IT COST?
This project is wallet-friendly:
- Wood Plank: $10-15
- L-Brackets: $5-10
- Screws/Anchors: $3-5
- Stain/Paint: $5-10
- Total: $23-40 Compare that to $50+ for pre-made shelves—you’re saving money and getting a custom piece.
OPTIONAL TOOLS TO MAKE IT EASIER
If you want to streamline the process, here are two handy picks from Amazon:
- BLACK+DECKER 20V Cordless Drill—Makes screwing a breeze.
- Minwax Wood Stain—Adds a professional finish. These are optional but can save time and effort.
PERSONALIZATION AND STYLE IDEA
Your wooden wall shelf is a blank canvas—here’s how to make it uniquely yours:
- Color Play—Go bold with a bright paint like teal or mustard yellow for a modern vibe, or stick to classic neutrals like white or gray for a timeless look. A two-tone design (stained top, painted edges) adds flair.
- Hardware Upgrade—Swap basic L-brackets for decorative ones—think black matte or brass finishes for a chic touch.
- Functional Add-Ons—Screw in small hooks underneath for keys or lightweight baskets for extra storage.
- Themed Decor—Match your shelf to a theme—rustic with burlap accents, minimalist with sleek pottery, or boho with macrame and greenery. These tweaks turn a simple shelf into a standout piece that reflects your personality. Mix and match to find your perfect style!
CREATIVE TWISTS TO TRY
Once you’ve nailed the basics, experiment:
- Floating Look—Hide brackets with a hollow wood design.
- Multi-Level—Stack shelves for more storage.
- Rustic Vibe—Distress the wood with sandpaper and a darker stain. Make it your own!
CONCLUSION: YOUR DIY SHELF AWAITS
Building a wooden wall shelf at home is a quick, rewarding way to enhance your space. With a few tools and this guide, you’ve created something practical and personal.
At ezPRATIK, we love “Easy Pratik, DIY Fun”—and this project proves how simple it can be. So, grab your supplies, follow these steps, and enjoy your handiwork.
What will you build next?
Would you like to see more handmade HOME DECOR tutorials?
Click to See More DIY Crafts Projects!
Click to See More DIY Home Decor Projects!
Click to See More DIY Grow Easy Projects!
Click to See More Sparkle DIY Projects!
Click to See More DIY Kids Craft Projects!
Similar Posts
- 6 Steps to DIY Paper Lanterns: A Simple Craft Tutorial
 WHY MAKE DIY PAPER LANTERNS? Paper lanterns add a warm, festive glow to any… Read more: 6 Steps to DIY Paper Lanterns: A Simple Craft Tutorial
 - Wooden Wall Shelf: 6 Easy Steps to Create a Beautiful Wooden Wall Shelf
 Looking to spruce up your home with a touch of style and practicality? A… Read more: Wooden Wall Shelf: 6 Easy Steps to Create a Beautiful Wooden Wall Shelf
 - 6 Easy Steps to Create Beautiful Decorative Candle Holders from Old Jars!
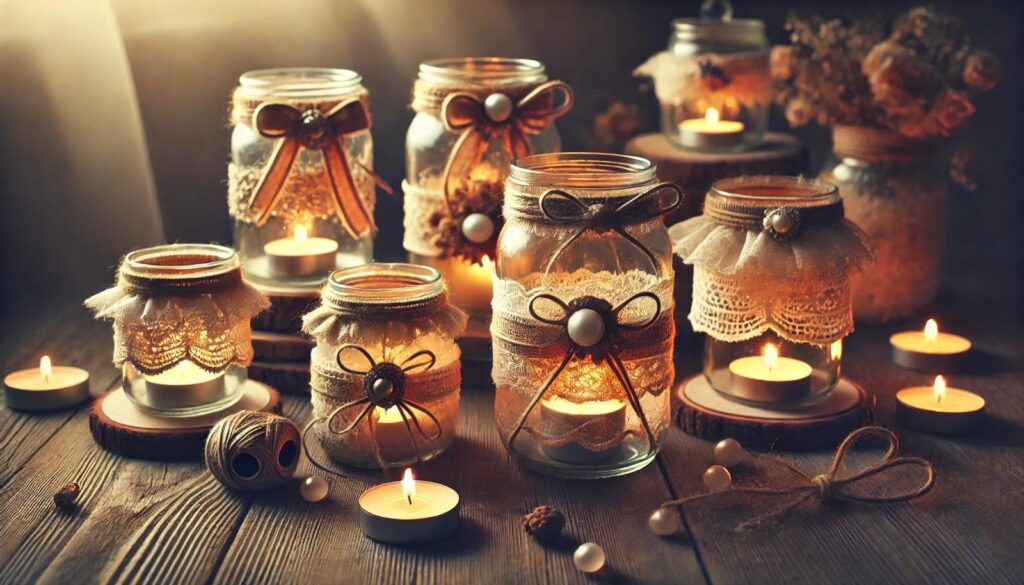
 WHY MAKE CANDLE HOLDERS FROM OLD JARS? Turning old jars into candle holders is… Read more: 6 Easy Steps to Create Beautiful Decorative Candle Holders from Old Jars!
 - Coffee Table from a Pallet: 6 Steps to Creative Ways to Transform Your Space
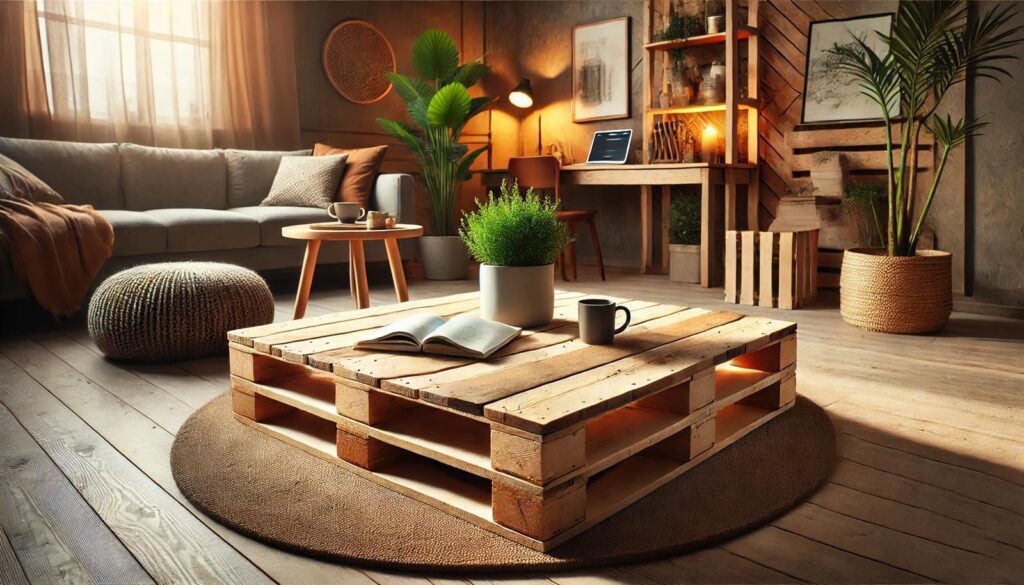
 WHY MAKE A COFFEE TABLE FROM A PALLET? A pallet coffee table blends rustic… Read more: Coffee Table from a Pallet: 6 Steps to Creative Ways to Transform Your Space
 - 6 steps to Brighten Your Walls: DIY Wall Art Ideas. Tired of Blank Walls?
 WHY MAKE YOUR OWN WALL ART? DIY wall art turns boring spaces into personal… Read more: 6 steps to Brighten Your Walls: DIY Wall Art Ideas. Tired of Blank Walls?