How to Make a DIY Friendship Bracelet with Simple Tutorials?
Craft Ideas
Looking for a thoughtful gift or a fun accessory? A DIY friendship bracelet is the perfect handmade craft project! At Ezpratik, we say “Easy Pratik, DIY Fun,” and this guide offers simple craft tutorials to weave a colorful bracelet with basic knots. It’s a beginner-friendly DIY craft project you can wear or share. Let’s get started!
WHY MAKE A DIY FRIENDSHIP BRACELET?
Friendship bracelets are a timeless way to show you care. Here’s why this DIY craft project shines:
- It’s affordable—made with inexpensive materials.
- It’s personal—customize with colors and patterns.
- It’s easy—perfect for beginners with simple knots.
- It’s meaningful—great for gifting to friends or family.
Plus, it’s a relaxing craft that sparks creativity. Ready to weave? Let’s gather your supplies!
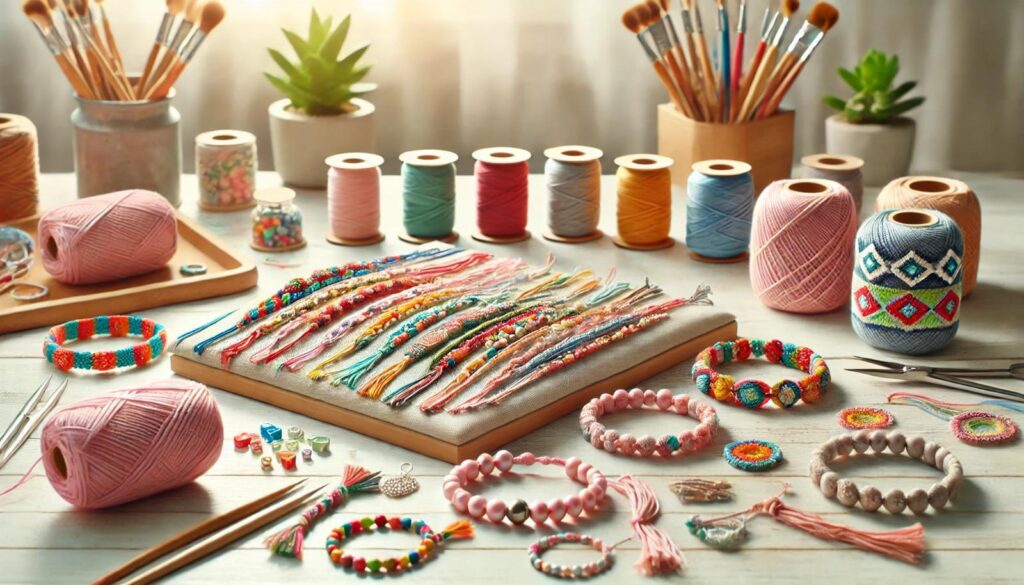
MATERIALS AND TOOLS YOU’LL NEED
You likely have most of these at home. Here’s what you’ll need for this DIY craft project:
Materials:
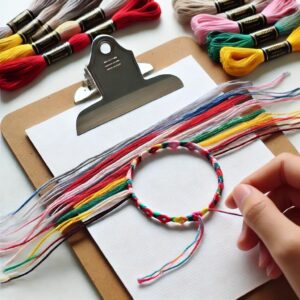
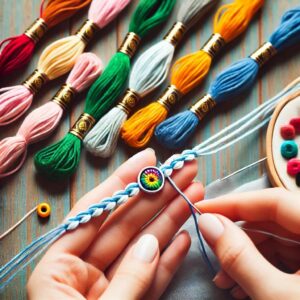
- Embroidery Thread—3-5 colors, about 2-3 feet each strand.
- Tape or Clipboard—To secure your threads while knotting.
- Beads (Optional)—Small beads for extra flair.
Tools:
- Scissors—For cutting thread to size.
- Measuring Tape—To measure thread lengths.
- Comb (Optional)—To straighten threads if they tangle.
Got everything? Great! If not, they’re easy to find. Let’s start crafting your bracelet!
STEP-BY-STEP GUIDE TO MAKING YOUR FRIENDSHIP BRACELET
Follow these simple craft tutorials to weave your bracelet. Take your time—it’s all about the process.
Step 1: Prep Your Threads
- Pick 3-5 colors of embroidery thread—cut each to about 2-3 feet long.
- Tie all threads together with a knot at one end—leave a 2-inch tail.
- Secure the knot to a surface with tape or a clipboard.
This keeps your threads organized.
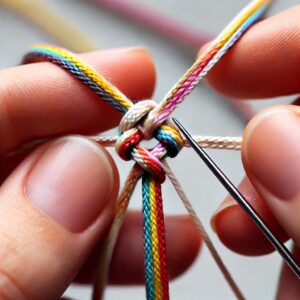
Step 2: Start with a Basic Knot
- Arrange threads in your desired color order—number them 1, 2, 3, etc. left to right.
- Take thread 1 and make a “4” shape over thread 2.
- Pull thread 1 under thread 2 and through the loop—tighten into a knot.
- Repeat this knot twice on thread 2, then move to thread 3, and so on across all threads.
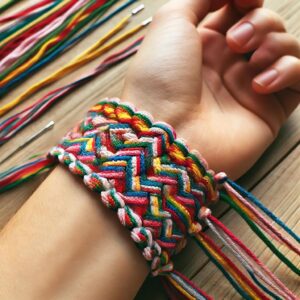
This creates a diagonal stripe pattern.
Step 3: Continue the Pattern
- Once you finish a row, start again with the new leftmost thread (now thread 2).
- Repeat the “4” knot across all threads—watch your pattern grow!
- Keep going for 2-3 inches or until it fits your wrist.
You’ll see colorful stripes emerge.
Step 4: Add Beads (Optional)
- After a few rows, slide a small bead onto the leftmost thread before knotting.
- Knot around the bead to secure it—continue your pattern.
- Space beads evenly or cluster them for flair.
This adds a personal touch.
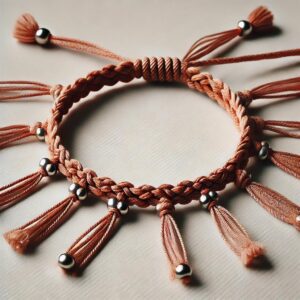
Step 5: Finish the Bracelet
- Once it’s long enough, tie a knot with all threads to secure the end—leave a 2-inch tail.
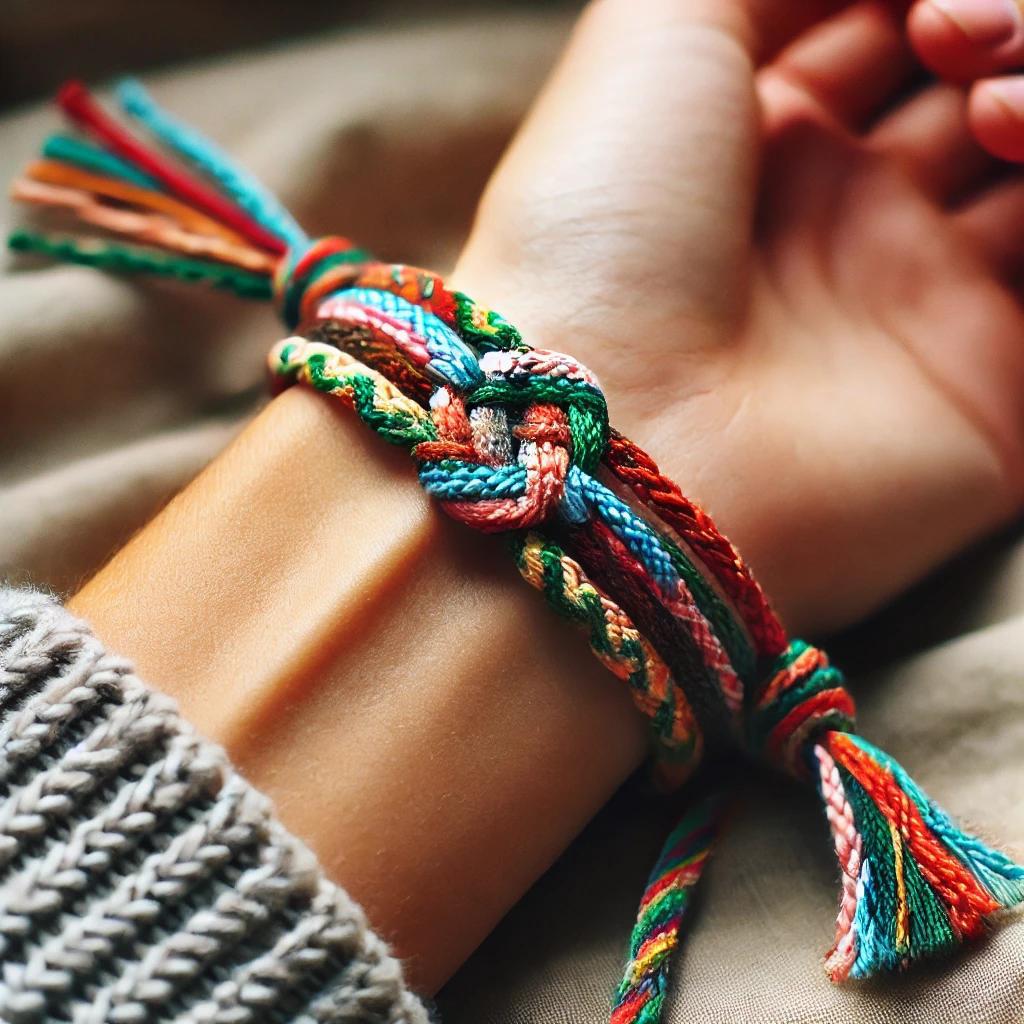
- Braid the tails on both ends for a tidy finish—or leave them loose for a boho look.
- Trim excess thread with scissors.
Your bracelet is ready!
Step 6: Wear or Gift
- Tie the bracelet around your wrist—use the tails to knot it securely.
- Or gift it to a friend with a sweet note!
You’ve made a handmade craft to cherish.
TIPS FOR A PERFECT FRIENDSHIP BRACELET
- Keep Tension Even—Tight knots make clean lines.
- Mix Patterns—Alternate colors or try a chevron knot for variety.
- Practice First—Test knots on scrap thread.
- Add Charms—Clip small charms for extra sparkle.
HOW MUCH WILL IT COST?
This DIY craft project is budget-friendly:
- Embroidery Thread: $2-5 (one pack lasts multiple projects)
- Beads: $0-3 (optional)
- Total: $2-8
Store-bought bracelets start at $5—you’re saving money!
OPTIONAL SUPPLIES TO MAKE IT EASIER
Want a smoother craft? Here are two picks from Amazon:
- Embroidery Thread Pack—Bright colors for variety.
- Small Beads Set—Perfect for adding charm.
They’re optional but handy.
PERSONALIZATION AND STYLE IDEAS
Make your bracelet unique:
- Color Pop—Use neon threads for a bold look.
- Initial Charms—Add a letter bead for a personal touch.
- Double Layer—Weave two thin bracelets and tie together.
- Metallic Shine—Mix in a gold or silver thread.
Your style, your craft—get creative!
CREATIVE TWISTS TO TRY
Level up with these ideas:
- Anklet Style—Make it longer for an ankle bracelet.
- Heart Pattern—Learn a heart knot for a sweet design.
- Adjustable Knot—Use a sliding knot instead of braids.
Experiment and have fun!
CONCLUSION: YOUR HANDMADE BRACELET SHINES
Weaving a DIY friendship bracelet is a simple, heartfelt way to craft something special. With Ezpratik’s simple craft tutorials, you’ve created a handmade craft to wear or share. What’s your next crafting adventure?
Would you like to see more handmade HOME DECOR tutorials?
Click to See More DIY Crafts Projects!
Click to See More DIY Home Decor Projects!
Click to See More DIY Grow Easy Projects!
Click to See More Sparkle DIY Projects!
Click to See More DIY Kids Craft Projects!
Similar Posts
- How to Create a Handmade Bookmark with Fabric Scraps?
 WHY CREATE A HANDMADE BOOKMARK? Handmade bookmarks add a personal touch to your reading. Here’s… Read more: How to Create a Handmade Bookmark with Fabric Scraps?
 - DIY Polymer Clay Earrings at Home
 WHY MAKE DIY POLYMER CLAY EARRINGS? Polymer clay earrings are a fun, fashionable way to… Read more: DIY Polymer Clay Earrings at Home
 - How to Create a Handmade Greeting Card?
 WHY CREATE A HANDMADE GREETING CARD? Handmade greeting cards add a personal touch to your… Read more: How to Create a Handmade Greeting Card?
 - How to Make a Felt Keychain with Handmade Charm?
 WHY MAKE A FELT KEYCHAIN? Felt keychains are adorable, practical, and easy to craft. Here’s… Read more: How to Make a Felt Keychain with Handmade Charm?
 - DIY Bath Bombs: a Simple Craft Tutorial
 WHY MAKE DIY BATH BOMBS? Bath bombs add luxury to your bath while being easy… Read more: DIY Bath Bombs: a Simple Craft Tutorial