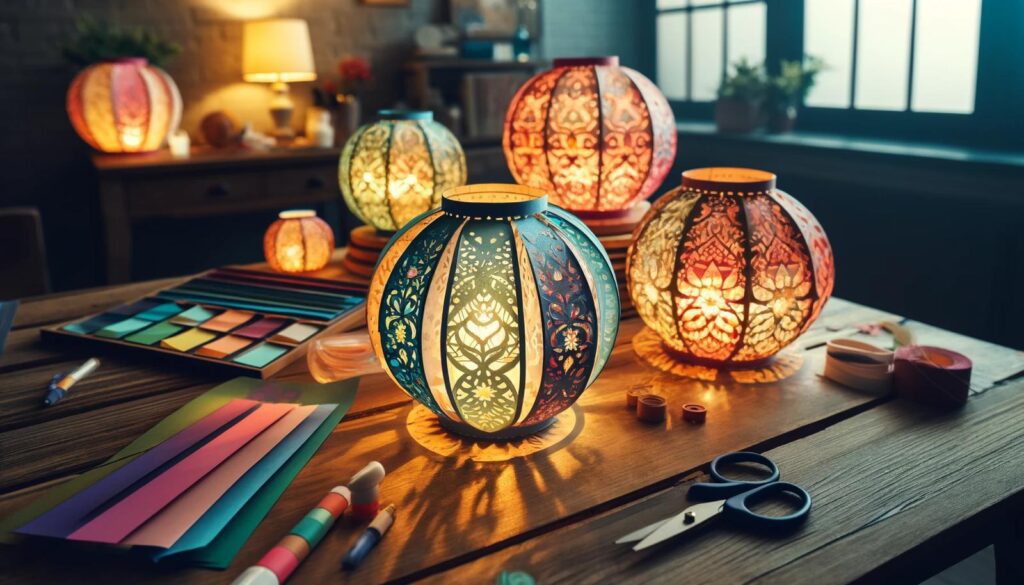
DIY Paper Lanterns: A Simple Craft Tutorial
Creative Craft Ideas
Brighten your space with DIY paper lanterns—our simple craft tutorials make it a festive project! At Ezpratik, we say “Easy Pratik, DIY Fun,” and this guide offers an easy DIY craft project to create glowing lanterns with paper. They’re perfect for parties, decor, or gifting. Let’s light up your creativity!
WHY MAKE DIY PAPER LANTERNS?
Paper lanterns add a warm, festive glow to any setting. Here’s why this DIY craft project is a delight:
- It’s affordable—uses basic paper and lights.
- It’s customizable—pick colors and designs you love.
- It’s quick—finish in under an hour.
- It’s charming—perfect for events or home decor.
Plus, it’s a fun way to create ambiance. Ready to craft? Let’s gather your supplies!
MATERIALS AND TOOLS YOU’LL NEED
You’ll need a few simple items for this DIY craft project—most are likely at home.
Materials:

- Colored Paper—Construction paper or cardstock (8.5 x 11 inches).
- Battery-Operated Tea Lights—For safe lighting.
- Double-Sided Tape—For sticking paper.
- String or Ribbon—To hang your lanterns.
- Decorations—Stickers, glitter, or washi tape (optional).
Tools:
- Scissors—For cutting paper.
- Ruler—For measuring and scoring.
- Pencil—To mark lines.
- Paper Punch (Optional)—For decorative holes.
Got these? Great! If not, they’re easy to find. Let’s start crafting your lanterns!
STEP-BY-STEP GUIDE TO MAKING YOUR PAPER LANTERNS
Follow these simple craft tutorials to create glowing lanterns. It’s a fun, quick project.
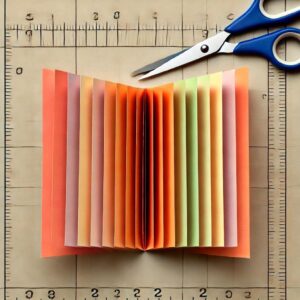
Step 1: Prep Your Paper
- Take a sheet of colored paper—cut to 8.5 x 11 inches if needed.
- Measure and mark 1-inch strips along the short side—cut these strips off to create a handle later.
- Fold the remaining paper in half lengthwise—crease sharply.
This sets up your lantern base.
Step 2: Cut the Lantern Slits
- With the paper folded, measure 1 inch from the open edge—mark a line.
- From the folded edge, cut 1-inch wide slits up to the marked line—space evenly.
- Unfold the paper—you’ll see parallel slits across the middle.
These slits create the lantern effect.
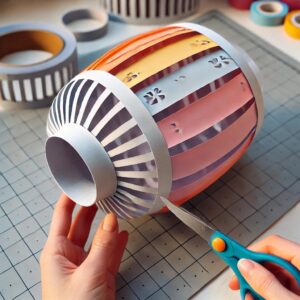
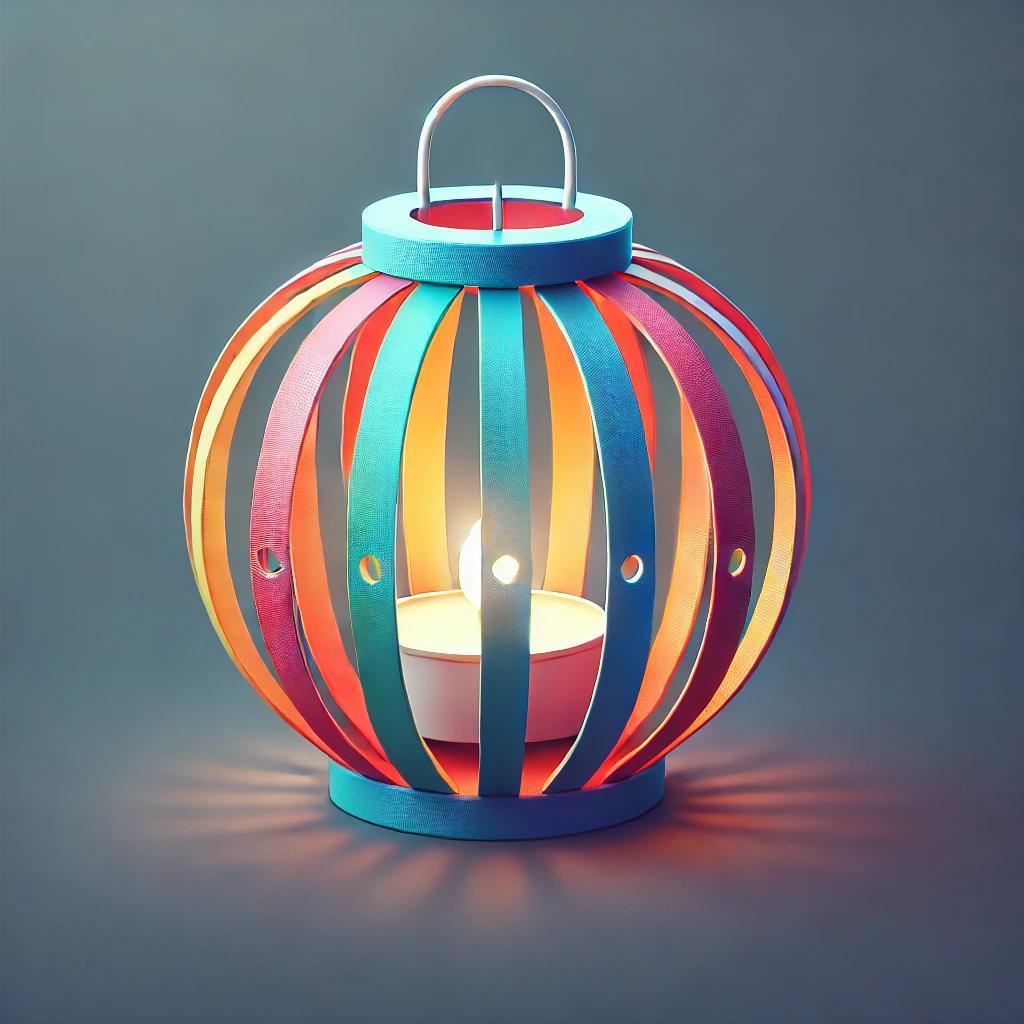
Step 3: Form the Lantern Shape
- Roll the paper into a cylinder—overlap the short edges by ½ inch.
- Secure the overlap with double-sided tape—press firmly.
- Gently push the top and bottom edges toward the center—the slits will fan out, forming a lantern shape.
Your lantern is taking shape!
Step 4: Add the Handle
- Take the 1-inch strip you cut earlier—fold it in half for strength.
- Tape each end to the inside top edge of the lantern—opposite sides.
- Ensure it’s secure—it’ll hold the lantern when hung.
The handle makes it hangable.
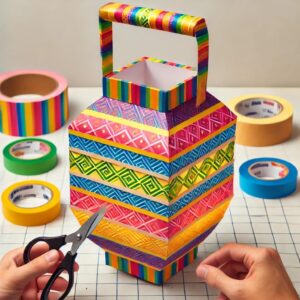
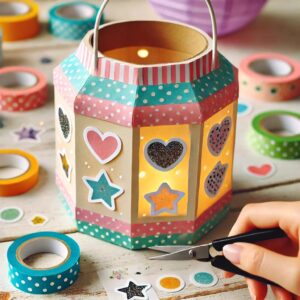
Step 5: Decorate Your Lantern
- Add stickers, washi tape, or glitter along the top and bottom edges.
- Punch small decorative holes (like stars or hearts) for light to peek through.
- Keep it simple or go all out—your choice.
Decorations add festive flair.
Step 6: Light It Up
- Place a battery-operated tea light inside—set it on the bottom.
- Hang your lantern with string or ribbon, or place it on a surface.
- Turn on the light—watch it glow through the slits!
You’ve made a festive masterpiece!
TIPS FOR PERFECT PAPER LANTERNS
- Use Stiff Paper—Cardstock holds shape better than thin paper.
- Test Light First—Ensure your tea light fits inside.
- Avoid Real Candles—Paper is flammable, so stick to battery lights.
- Even Cuts—Measure slits for a uniform look.
HOW MUCH WILL IT COST?
This DIY craft project is super affordable:
- Colored Paper: $1-3
- Tea Lights: $2-5
- Double-Sided Tape: $1-2
- String/Ribbon: $0-2 (use scraps)
- Total: $4-12
Store-bought lanterns start at $5—you’re saving money!
OPTIONAL SUPPLIES TO MAKE IT EASIER
Want a smoother craft? Here are two picks from Amazon:
- Colored Cardstock Pack—Variety for vibrant lanterns.
- Battery Tea Lights—Safe and flickering glow.
They’re optional but helpful.
PERSONALIZATION AND STYLE IDEAS
Make your lantern unique:
- Holiday Theme—Use red and green for Christmas vibes.
- Glow Stars—Paint stars with glow-in-the-dark paint.
- Patterned Paper—Use scrapbook paper for intricate designs.
- Mini Lanterns—Make smaller versions for a garland.
Your lantern, your style—get festive!
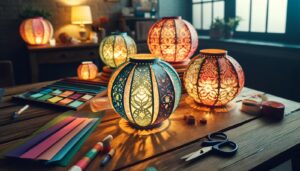
CREATIVE TWISTS TO TRY
Level up with these ideas:
- Lantern Chain—String multiple lanterns for a party.
- Watercolor Base—Paint the paper with watercolor first.
- LED Fairy Lights—Use tiny lights for a magical glow.
Experiment and light up your space!
CONCLUSION: YOUR LANTERNS GLOW WITH JOY
Crafting DIY paper lanterns at home is a simple, festive way to create decor. With Ezpratik’s simple craft tutorials, you’ve made a handmade craft to brighten any occasion. What’s your next glowing project?
Would you like to see more handmade HOME DECOR tutorials?
Click to See More DIY Crafts Projects!
Click to See More DIY Home Decor Projects!
Click to See More DIY Grow Easy Projects!
Click to See More Sparkle DIY Projects!
Click to See More DIY Kids Craft Projects!
Similar Posts
- 6 Steps to DIY Paper Lanterns: A Simple Craft Tutorial
 WHY MAKE DIY PAPER LANTERNS? Paper lanterns add a warm, festive glow to any setting.… Read more: 6 Steps to DIY Paper Lanterns: A Simple Craft Tutorial
 - Wooden Wall Shelf: 6 Easy Steps to Create a Beautiful Wooden Wall Shelf
 Looking to spruce up your home with a touch of style and practicality? A wooden… Read more: Wooden Wall Shelf: 6 Easy Steps to Create a Beautiful Wooden Wall Shelf
 - 6 Easy Steps to Create Beautiful Decorative Candle Holders from Old Jars!
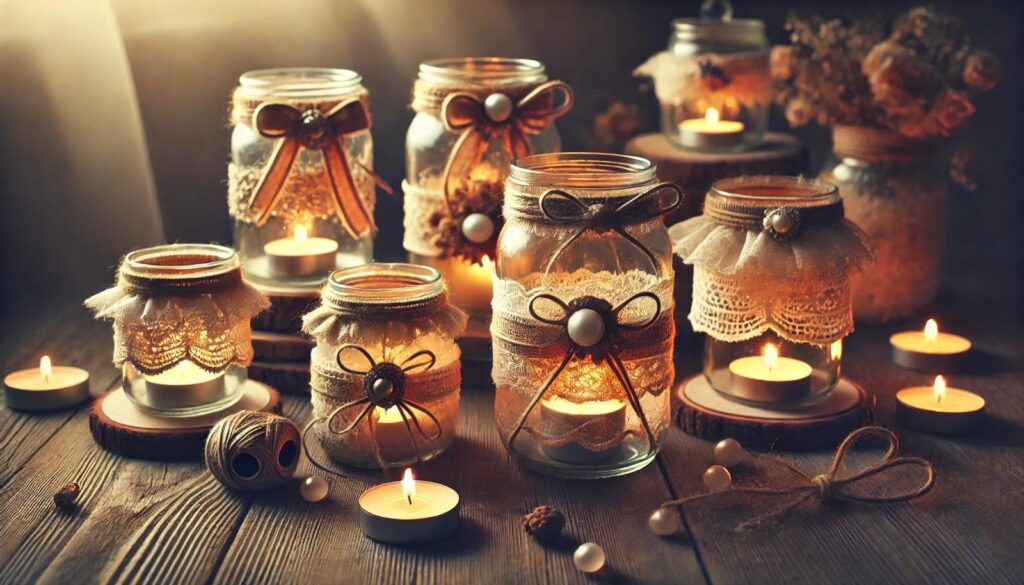
 WHY MAKE CANDLE HOLDERS FROM OLD JARS? Turning old jars into candle holders is a… Read more: 6 Easy Steps to Create Beautiful Decorative Candle Holders from Old Jars!
 - Coffee Table from a Pallet: 6 Steps to Creative Ways to Transform Your Space
 WHY MAKE A COFFEE TABLE FROM A PALLET? A pallet coffee table blends rustic charm… Read more: Coffee Table from a Pallet: 6 Steps to Creative Ways to Transform Your Space
 - 6 steps to Brighten Your Walls: DIY Wall Art Ideas. Tired of Blank Walls?
 WHY MAKE YOUR OWN WALL ART? DIY wall art turns boring spaces into personal galleries.… Read more: 6 steps to Brighten Your Walls: DIY Wall Art Ideas. Tired of Blank Walls?